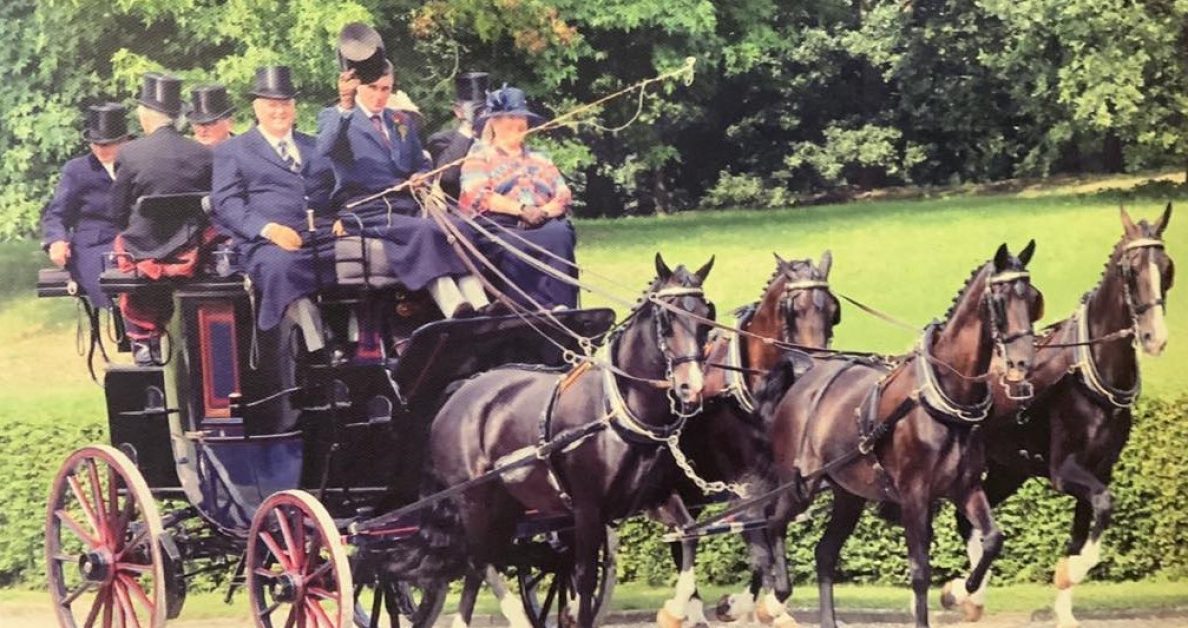

Generally speaking, it’s best to start a horse to harness at around 3 years old, but this can vary according to breed, temperament and level of physical maturity. Let’s assume that your young horse has been well handled, is halter broken, and accepts a bit and simple bridle.
In the initial stages of starting a horse to harness, we gently introduce pieces of harness, starting with a pad. Once they are comfortable with that, we add a crupper.
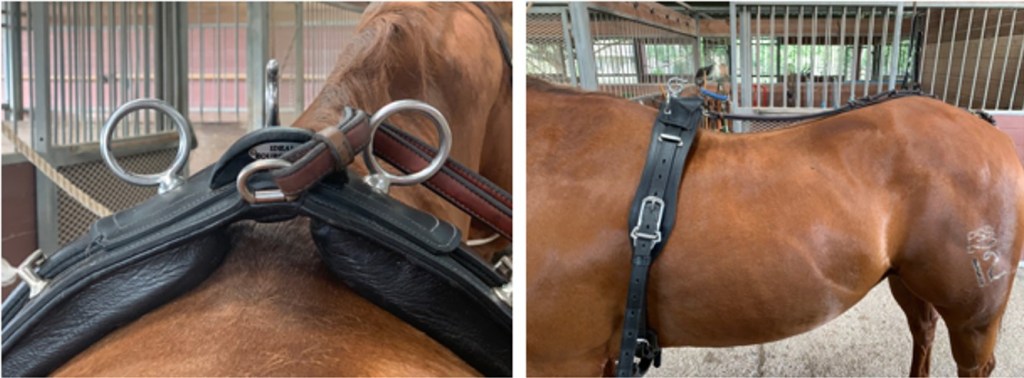
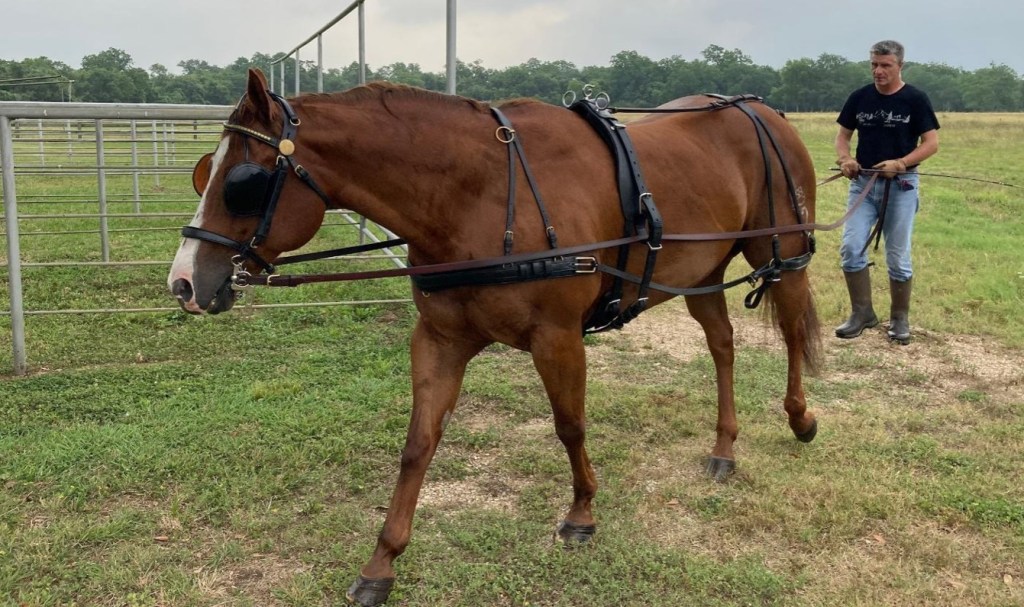
Your pad or saddle should sit just behind the withers and have sufficient space for the spine of the horse. Tighten the girth slowly, just as you do when riding, to prevent pinching and to allow the horse to relax. To ensure the harness fits correctly, you should be able to get four fingers between the horse’s loin and the back strap.
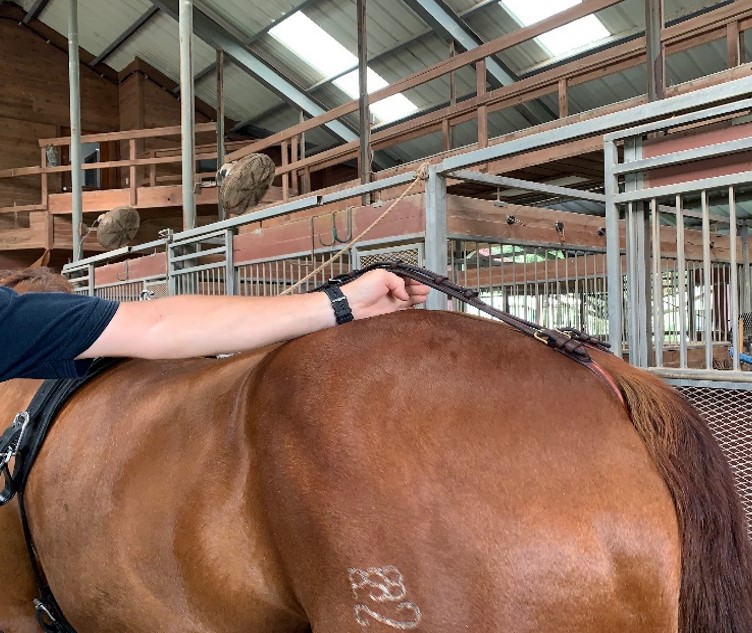
When buckling the crupper, it’s very important to pay attention. Stand to one side and ensure that as you pick up the dock (tail), you gather all of the tail hairs to prevent them laying between the crupper and dock. Hair trapped this way can cause discomfort or pain.
The horse is now ready to be lunged. Lunging is good for getting your horse accustomed to voice commands and a whip, as well as wearing the harness.

Once the horse is lunging quietly and confidently with the pad, back strap, and crupper, you are ready to start introducing more pieces of harness.
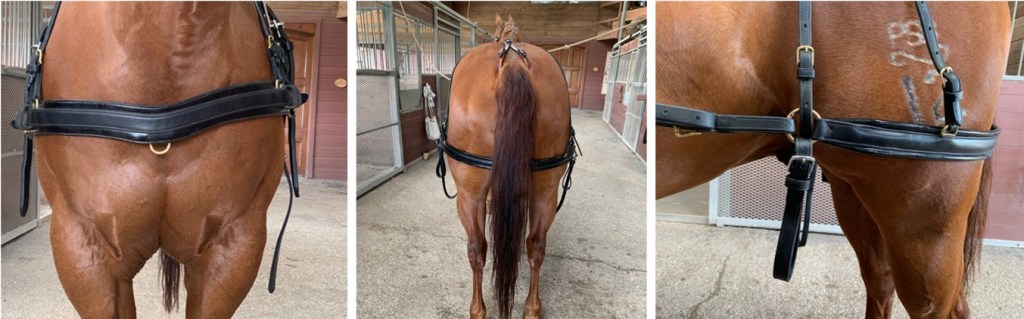
At this point, I generally add the breast collar and breeching together, as you can link them to ensure that they don’t flap about. The breast collar should sit just above the point of the shoulder and below the horse’s windpipe (trachea) to avoid placing pressure on the horse’s respiratory system. The breeching should be adjusted so that the seat of the breeching sits midway between the top of the dock and the point of the hock, and should be long enough that the hold back rings reach from stifle to stifle.
As the horse slowly becomes accustomed to wearing breeching, you can buckle the hold back straps to the breast collar slightly tighter to replicate the pressure the horse will feel when stopping or going downhill.
You may ask, why do we use breeching? We use it because traditionally most two wheeled carriages didn’t have brakes and the breeching allows the horse to brake/hold back a carriage when stopping or going downhill. If a horse isn’t accustomed to wearing breeching, it can be quite alarming when the harness applies pressure to the horse’s hindquarters and can cause it to buck.
Once your horse is relaxed and lunging quietly with the breast collar and breeching, it’s time to start introducing long lining to build more confidence, to get the horse accustomed to the full harness, and learn your aids and voice commands. It’s always good to have an assistant when you start long lining to ensure safety for both horse and driver, as the horse may initially spook or try to turn around. Your assistant should have a lead rope attached to a halter that fits comfortably under the bridle. As the horse gains more confidence, the assistant can slowly move back and unclip the lead rope.
All of this is initially done in a regular simple riding bridle. Later, you can introduce a driving bridle with blinkers. Blinkers help horses focus on what’s in front of them rather than being distracted by what’s around them, or even by the driver sitting behind or above them.
The whip replaces your leg aids when driving. If you want a horse to go forward, touch them on the shoulder. If you want to help them bend, touch the barrel of the horse just behind the girth, as you would with your legs when riding. The whip can be used to help comfort and relax a horse when it’s feeling tense by gently rubbing it across the horse’s back. It should never be used on the horse’s rump as it may startle them and cause them to buck.
When long lining, it’s best to use a driving whip with a short lash, because the long lash of a lunge whip can be a tripping hazard. Reins should also be unbuckled when long lining, to reduce the chance of catching your foot in the loop. It’s also good to wear a pair of gloves (this also applies to lunging).
Once the horse is calm and confident in long lining, is relaxed, and understands your voice aids and whip aids, he is well on his way to becoming a driving horse! The next step will be to introduce traces and teach them how to pull a load. Watch this blog for Part Two, Starting a Horse to Drive!
Fun fact: horses are said to pull a carriage or wagon. However, mechanically speaking, they push it. Read more here!

How do I find your blog for part 2
kind regards
Jo
LikeLike
Jo, thanks for your interest… and the reminder! We plan to publish our Part 2 within the next couple of weeks!
LikeLike